Friday 28 February 2014

MDS Congratulations!

Today I am going to share two cards that I have made using My Digital Studio, members of my downline have had promotions and begun building there own teams recently and I like to send a little note to say well done.  This time I’ve used a card I designed in MDS. 

Congratulation Card-001

I started with the colour scheme from ColourQ,  and came up with the card above.  Here’s the inspiration picture for this week’s challenge, click on it and see what the design team and other participants have done with the colours.


Having designed the first card, I noticed that it was quite close to this weeks sketch over at Freshly Made Sketches, click on the picture to see what the design team have created.
All I needed to do was switch the orientation and make a couple of other tweaks, and here is my final card, this is the one that I am entering into both challenges.

Congratulation Card_2-001

If you’d like to have a go at using MDS you can get a 30 day FREE trial, click on the image below and you will be taken to my online shop.

Table built using Product Table Builder by The Crafty Owl - Independent Stampin' Up! Demonstrator.


Thursday 27 February 2014

Happy Watercolour - ombre effect

Hello, I didn't get round to blogging yesterday as I spent the whole day with a thumping headache :( I’m back today though, with the first of the Happy Watercolour cards from my February card class.  I wanted a quick, clean and simple card and I hope this fits the bill.  To get the ombre, or colour fade effect I have inked the stamp once in Rich Razzleberry then ‘huffed’ on it between each stampimg without reinking.  I love that you can get a variation in tone using this effect.  We also made a coordinating envelope using the punch board as this is a bigger than normal 5 1/2 inch square card.

0175595af5744df89494e03cae49ac6e23a6996212

Here’s a close up, you can really see the detail in the graduated stamp.

01a4ce7ddb61f7e9d95d5563a2f50fb46a38260fc9

I really hope that you like today’s quick share, come back soon to see what else we made with Happy Watercolour.  If you want to buy any of the items I've used you can click on the picture below and it will take you straight to my online shop.

Table built using Product Table Builder by The Crafty Owl - Independent Stampin' Up! Demonstrator.


Tuesday 25 February 2014

Tuesday’s tip–an idea for storage

Today I want to share a quick tip with you.  Our gorgeous stamps come in fabulous DVD style cases (the wood boxes are wider) this is fab if you have open shelf storage in a custom built craft room (I wish!)  This is my storage, a 5x5 block storage unit from a famous Swedish furniture store ;)  this is actually the bottom end of my kitchen and just in front of the unit is my kitchen table, I would love a proper craft room one day but for now this is it.  In order to maximise space most of the boxes are full, my stamps are in the two top boxes in from the right.  Wood in the blue one and clear in the black one.

01f2ab8a536ea2d4967162e1a1848ae4afcc37ff86

The stamps stack in the box vertically so you can’t see the spines.  When your stamps come you get a sheet of stickers, the name of the stamp set is also printed on the sticker sheet.  This is one of my host exclusive stamps Banner Blast, I've already mounted one of the stamps before this picture but you can see where the name is printed.

010e49219b66b86b3c7c2f89f8ead91ec67faf06b9

My trick is to cut the name strip off the sheet and stick it to the top of the stamp case, like this…

0188a6279f34fb5a6b57bf27465b6653d711df0f11

So even though I don’t have custom shelving for my stamps, I have managed to customise my stamps to fit my shelving.  This is what my stamps look like inside their box, nice and easy to identify.

01b365930e5b3bee1b50cfe02db77a72a4e817e20f

Pop back tomorrow to see some of what we got upto last week in my classes.

Monday 24 February 2014

So very grateful

Happy Monday!  Half term is over, Thomas is back at school. Martin is back to work and Daisy and I are back to some sort of normality :)  I’m feeling very grateful that she asked for a nap after her lunch as I have a HUGE to do list!  My plan for the next hour is to get some blog posts scheduled as I have lots to share, and catch up on a bit of housework – not very exciting but needs must.

017e8f1d6045af8a77a5d221cd01c46db42d653bda

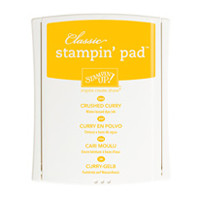
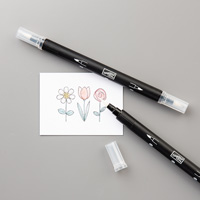
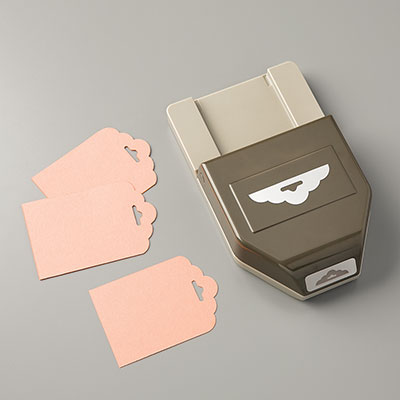
Today I wanted to share some beautiful tags that I made to go on my last batch of customer orders, I like to make either a card or a tag as a little thank you.  I’ve used the lovely new set called So Very Grateful and used my inkpads and bender pens to colour the image in.  Here’s a close up showing the detail better, I love how easy it is to created the watercolour effect with the bender pens.  I’ve actually used three colours on the peachy coloured flowers. Crushed Curry for the centres, a wash of Pumpkin Pie on the petals then a touch of Melon Mambo over the top.  To create the depth on the leaves I have used an Old Olive marker pen on the veins and then used a bender pen to pull the colour out.

01628f18a6bfd67609f66d0da4f5e299b9d6f0513c

I’ve booked a venue for my first ALL DAY CRAFT EVENT, I can’t wait!  Lots of project planning, writing instructions, sorting kits etc to do but I am so looking forward to it.  I will share sneak peeks on my facebook page, why not pop over and see what else I have going on over there and if you could give me a ‘like’ too that’d be awesome!  In the meantime here are a few bullet points to answer any questions you have, spaces are limited but I’d love for you to come so get in touch ASAP.
  • The timing of the day is 10am – 4pm, venue Blackthorn Community Centre and Children’s Centre, Longmead Court, Northampton
  • The price for the day is £45 for this you get a goody bag with £30 worth of product and all instructions for the projects as well as refreshments throughout the day.
  • You will need to bring your lunch and a basic tool kit including adhesives, scissors and a paper trimmer (if you have one).
  • There will be an AMAZING raffle on the day with lots of prizes.  Prizes will include stamp sets, papers, accessories and tools.  Tickets will cost £5 a strip or £10 for 3 strips (all prizes will be worth £10 or more)
  • If you bring a friend along (who is not already a customer of mine) you will both get a FREE gift and an extra raffle ticket.
  • The projects for the day will include cards, 3d items, a mini album and a scrapbook page.
  • There will be an inspirational display for you to view – bring your camera J
  • Full payment needs to be made to me by Thursday 13th March to make sure that I can order the products needed in time.  You can pay me by cash, bank transfer or cheque (if chq I will need a week earlier to allow for clearing)

Want to have a go at this project for yourself?  Click on any of the items below to go straight to my online store and buy the items today.
Table built using Product Table Builder by The Crafty Owl - Independent Stampin' Up! Demonstrator.


Thursday 20 February 2014

U Rock!

Today is going to be a very quick post.  I had a fabulous class last night, a one to one craft session this afternoon with a lovely new crafter and then this evening I have a very rare night out with some friends.

The card I am sharing today is a shameless case!  The original was designed by another demo friend of mine, Val.  The only change that I have made is to use black cardtock where Val used a washi tape.

0165f71366f9474dae1e4a0ac35fe361c040b0064a_00001

I love this cool and funky card, although that’s probably not the right way to describe it?  Maybe ‘sick’!  It’d be great as a birthday card or thank you, or even as a ‘just because’.

Table built using Product Table Builder by The Crafty Owl - Independent Stampin' Up! Demonstrator.